Hi everyone!
Easter is just around the corner! Yay!
One of my family’s favourite Easter traditions is decorating Easter eggs. First, we hardboil the eggs and let them cool, then add some vinegar and food colouring to a bowl of water, and (try to) wait patiently while the egg shells soak and take on deep shades of colour.
But what to do with the extra egg cartons that accumulate?
How about up-cycling the egg cartons into fun Easter bunnies!
These bunnies are perfect to use as Easter decorations around the house and make great gifts for teachers, friends and family.
Let’s get started!
Easter bunny craft for kids
Start to finish time: 15 minutes
Create a family of little Easter Bunnies! Add paint to make white, brown or even a pink bunny!
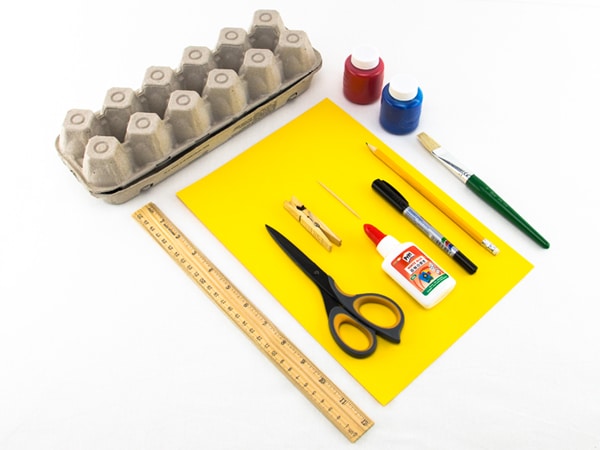
What you need:
- Cardboard egg carton
- Paint and paintbrushes
- Toothpick
- Black marker
- White glue
- Pencil, eraser and ruler
- Scissors
Step 1: Take out your supplies
- Prepare your work area
- Take out your paints and paint tray
- Lay down some newspaper and have a damp cloth handy for easy clean-up!
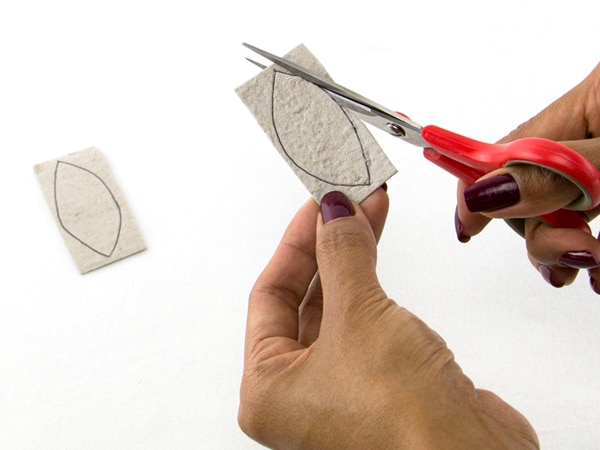
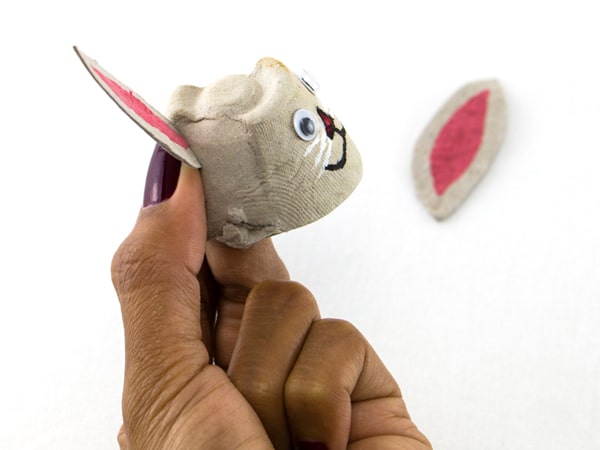
Step 2: Make your Easter bunny craft ears
- Cut 2 strips of the egg carton or cardboard for each bunny approximately 6cm x 3cm.
- Draw a bunny ear shape on the rectangle cardboard strips.
- Cut out the shapes.
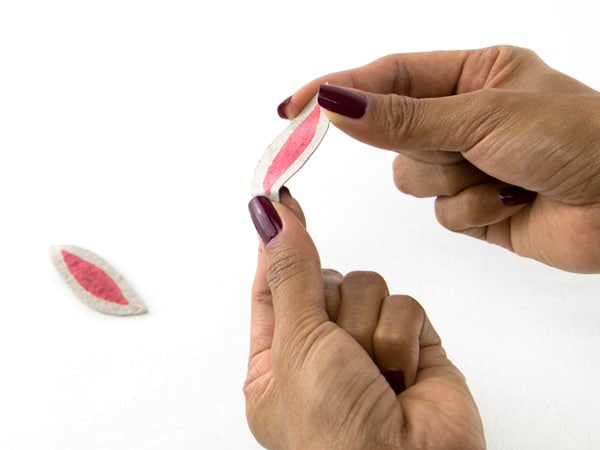
Step 3: Colour your bunny ears
- Draw a smaller ear shape on each ear to make the inside part of the bunny ear
- Colour the inside part of the ear white or pink, using paint or marker
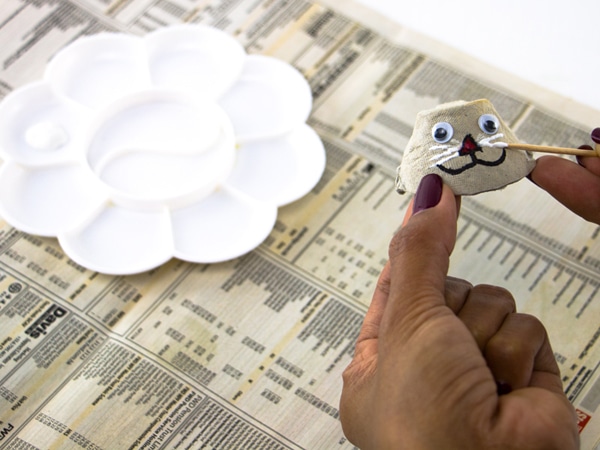
Step 4: Make your bunny’s face
- Cut out cups from the egg carton. Trim any excess cardboard
- Draw on the bunny’s eyes, mouth and pink nose with a marker
- Have googly eyes? Add them with a drop of glue
- Use a toothpick to add fine whiskers with white paint.
Step 5: Add your Easter bunny craft ears
- Bend the bottom tip of each ear about 1 cm.
- Put white glue onto the bent tip and stick on the back of the cup. Pinch and hold for 30 seconds. Let dry.
- (Can’t wait? Staple the ear to the cup!)
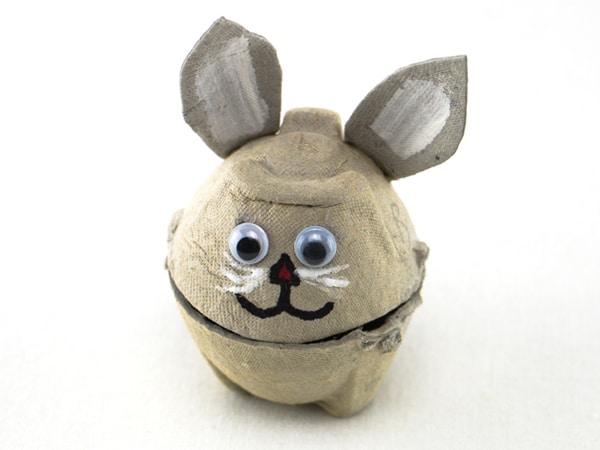
Your finished Easter bunny kids craft
- Taa-daa! You have a cute little bunny to hold an Easter egg or chocolates
If you are looking for fun arts and craft ideas, check out the DIY activities on our learning hub. Or if you are interested in a convenient way for your kids to learn creative thinking at home with your kids in Hong Kong, sign up for ActivityBox!
Sign-up for a flexible Month by Month Plan or get the full benefits from our 3-Month Plan and 6-Month Plan.
Each month you’ll receive a Box with 4 art and craft activities to do together with your kids at home. Step by step instructions and all the materials you need are included, so it’s easy to get started this weekend. And the art Tool Kit makes it even more convenient
Questions? Check out our FAQs page for more info.
Happy Crafting!
Until next time,
~ Miss Julie